OpenShift es la solución de Red Hat para la orquestación de contenedores basado en Kubernetes. ¿Te animas a probar la última versión de OpenShift sin tener que instalar un set de masters y workers?
En este tutorial les voy a explicar como desplegar un cluster sencillo de OpenShift para pruebas a través de la aplicación CodeReady Containers.
Al momento de esta publicación, tendremos instalada la version 4.7.0 de OpenShift.
PROMO DigitalOcean#
Antes de comenzar, quería contarles que hay una promoción en DigitalOcean donde te dan un crédito de USD 200.00 durante 60 días para que puedas probar los servicios que este Proveedor Cloud ofrece. Lo único que tienes que hacer es suscribirte a DigitalOcean con el siguiente botón:

O a través del siguiente enlace: https://bit.ly/digitalocean-itsm
Requisitos Minimos de Hardware#
Para poder correr correctamente OpenShift, necesitaremos de estos requisitos mínimos de Hardware:
- 4 CPUs virtuales (vCPUs)
- 8 GB memoria RAM.
- 35 GB de espacio en disco duro.
CodeReady Containers se puede ejecutar tanto en Linux, Windows o MacOS. Sin embargo, para este tutorial lo he probado en Fedora 32 y CentOS 7. CodeReady Containers viene empaquetado como una máquina virtual Red Hat Enterprise Linux que utiliza los hipervisores nativos de Linux (libvirt/KVM), Windows 10 (Hyper-V) y MacOS (HyperKit).
Paso 1: Registrarnos en la página Developers de Red Hat#
Para poder descargar el ejecutable de CodeReady Containers, vamos a necesitar registrarnos en el siguiente enlace: Red Hat Developers y además obtener nuestra clave Secret Pull.
Paso 2: Instalamos dependencias necesarias#
CodeReady Containers necesita los paquetes libvirt y NetworkManager, los cuales deben ser instalados.
Fedora 33
sudo dnf update -y
sudo dnf install libvirtd qemu-kvm virt-install NetworkManager
sudo systemctl enable --now libvirtd
Centos 7
sudo yum update -y
sudo yum install libvirtd qemu-kvm virt-install bridge-utils NetworkManager
sudo systemctl enable --now libvirtd
Paso 3: Instalar CodeReady Containers#
Descargamos el ejecutable actualizado de CRC desde el siguiente enlace:
wget https://mirror.openshift.com/pub/openshift-v4/clients/crc/latest/crc-linux-amd64.tar.xz
Extraemos los archivos:
tar xvf crc-linux-amd64.tar.xz
Copiamos el ejecutable en el $PATH de usuario:
cd crc
sudo cp crc /usr/local/bin
Confirmamos la instalación validando la versión del software:
crc version
Siempre es una buena idea consultar de cualquier programa, por lo que ejecutamos:
crc --help
CodeReady Containers is a tool that manages a local OpenShift 4.x cluster optimized for testing and development purposes

Usage:
  crc [flags]
  crc [command]

Available Commands:
  cleanup     Undo config changes
  config      Modify crc configuration
  console     Open the OpenShift Web Console in the default browser
  delete      Delete the OpenShift cluster
  help        Help about any command
  ip          Get IP address of the running OpenShift cluster
  oc-env      Add the 'oc' binary to PATH
  podman-env  Setup podman environment
  setup       Set up prerequisites for the OpenShift cluster
  start       Start the OpenShift cluster
  status      Display status of the OpenShift cluster
  stop        Stop the OpenShift cluster
  version     Print version information

Flags:
  -f, --force              Forcefully perform an action
  -h, --help               help for crc
      --log-level string   log level (e.g. "debug | info | warn | error") (default "info")

Use "crc [command] --help" for more information about a command.
Paso 4: Configuramos la máquina virtual de CodeReady Containers#
Ejecutamos el siguiente comando para configurar la máquina anfitriona:
crc setup
El instalador va a comprobar los requerimientos del sistema antes de desplegar la máquina virtual.
INFO Checking if oc binary is cached
INFO Caching oc binary
INFO Checking if podman remote binary is cached
INFO Checking if goodhosts binary is cached
INFO Caching goodhosts binary
INFO Checking if CRC bundle is cached in '$HOME/.crc'
INFO Unpacking bundle from the CRC binary
INFO Checking if running as non-root
INFO Checking if Virtualization is enabled
INFO Checking if KVM is enabled
INFO Checking if libvirt is installed
INFO Checking if user is part of libvirt group
INFO Checking if libvirt is enabled
INFO Checking if libvirt daemon is running
INFO Checking if a supported libvirt version is installed
INFO Checking if crc-driver-libvirt is installed
INFO Installing crc-driver-libvirt
INFO Checking for obsolete crc-driver-libvirt
INFO Checking if libvirt 'crc' network is available
INFO Checking if libvirt 'crc' network is active
INFO Checking if NetworkManager is installed
INFO Checking if NetworkManager service is running
INFO Checking if /etc/NetworkManager/conf.d/crc-nm-dnsmasq.conf exists
INFO Checking if /etc/NetworkManager/dnsmasq.d/crc.conf exists
Setup is complete, you can now run 'crc start' to start the OpenShift cluster
Una vez que la comprobación se haya realizado, iniciamos el cluster con el siguiente comando:
crc start
INFO Checking if oc binary is cached
INFO Checking if podman remote binary is cached
INFO Checking if goodhosts binary is cached
INFO Checking if running as non-root
INFO Checking if Virtualization is enabled
INFO Checking if KVM is enabled
INFO Checking if libvirt is installed
INFO Checking if user is part of libvirt group
INFO Checking if libvirt daemon is running
INFO Checking if a supported libvirt version is installed
INFO Checking if crc-driver-libvirt is installed
INFO Checking if libvirt 'crc' network is available
INFO Checking if libvirt 'crc' network is active
INFO Checking if NetworkManager is installed
INFO Checking if NetworkManager service is running
INFO Checking if /etc/NetworkManager/conf.d/crc-nm-dnsmasq.conf exists
INFO Checking if /etc/NetworkManager/dnsmasq.d/crc.conf exists
? Image pull secret [? for help]
Observe que va a necesitar la clave Pull Secret para continuar con la instalación, la cual puede copiar o descargar desde el siguiente enlace Install on Laptop: Red Hat CodeReady Containers
Pegue la clave Pull Secret en la terminal, y la instalación continuará (este proceso demorará algunos minutos dependiendo de su hardware):
INFO Extracting bundle: crc_libvirt_4.4.8.crcbundle ...
INFO Checking size of the disk image /home/enmanuelmoreira/.crc/cache/crc_libvirt_4.4.8/crc.qcow2 ...
INFO Creating CodeReady Containers VM for OpenShift 4.4.8...
INFO CodeReady Containers VM is running
INFO Verifying validity of the cluster certificates ...
INFO Check internal and public DNS query ...
INFO Check DNS query from host ...
INFO Generating new SSH key
INFO Copying kubeconfig file to instance dir ...
INFO Starting OpenShift kubelet service
INFO Configuring cluster for first start
INFO Adding user's pull secret ...
INFO Updating cluster ID ...
INFO Starting OpenShift cluster ... [waiting 3m]
INFO
INFO To access the cluster, first set up your environment by following 'crc oc-env' instructions
INFO Then you can access it by running 'oc login -u developer -p developer https://api.crc.testing:6443'
INFO To login as an admin, run 'oc login -u kubeadmin -p fq66o-KsVBU-cnKBU-xLpqd https://api.crc.testing:6443'
INFO
INFO You can now run 'crc console' and use these credentials to access the OpenShift web console
Started the OpenShift cluster
WARN The cluster might report a degraded or error state. This is expected since several operators have been disabled to lower the resource usage. For more information, please consult the documentation
Las credenciales de acceso las veremos en las últimas 6 lineas:
INFO Then you can access it by running 'oc login -u developer -p developer https://api.crc.testing:6443'
INFO To login as an admin, run 'oc login -u kubeadmin -p fq66o-KsVBU-cnKBU-xLpqd https://api.crc.testing:6443'
INFO You can now run 'crc console' and use these credentials to access the OpenShift web console
Habilitamos el acceso al cluster, configurando las variables de entorno:
crc oc-env
export PATH="/home/user/.crc/bin:$PATH"
eval $(crc oc-env)
Actualizamos nuestra shell para que podamos ejecutar los comandos de OpenShift:
bash
$ vim ~/.bashrc
export PATH="~/.crc/bin:$PATH"
eval $(crc oc-env)
zsh
$ vim ~/.zshrc
export PATH="~/.crc/bin:$PATH"
eval $(crc oc-env)
Y luego source
bash
source ~/.bashrc
zsh
source ~/.zshrc
Iniciamos sesión como admin, con el siguiente comando:
oc login -u kubeadmin -p fq66o-KsVBU-cnKBU-xLpqd https://api.crc.testing:6443
The server uses a certificate signed by an unknown authority.
You can bypass the certificate check, but any data you send to the server could be intercepted by others.
Use insecure connections? (y/n): y

Login successful.

You have access to 57 projects, the list has been suppressed. You can list all projects with 'oc projects'

Using project "default".
Confirmamos la configuración del cluster:
oc cluster-info
Kubernetes master is running at https://api.crc.testing:6443

To further debug and diagnose cluster problems, use 'kubectl cluster-info dump'.
oc get nodes
NAME                 STATUS   ROLES           AGE   VERSION
crc-rtgqw-master-0   Ready    master,worker   19d   v1.17.1+3f6f40d
oc config view
apiVersion: v1
clusters:
- cluster:
    certificate-authority-data: DATA+OMITTED
    server: https://192.168.42.229:8443
  name: 192-168-42-229:8443
- cluster:
    insecure-skip-tls-verify: true
    server: https://api.crc.testing:6443
  name: api-crc-testing:6443
- cluster:
    certificate-authority: /home/user/.minikube/ca.crt
    server: https://192.168.39.94:8443
  name: minikube
contexts:
- context:
    cluster: api-crc-testing:6443
    namespace: default
    user: kube:admin
  name: default/api-crc-testing:6443/kube:admin
- context:
    cluster: minikube
    user: minikube
  name: minikube
- context:
    cluster: 192-168-42-229:8443
    namespace: myproject
    user: developer/192-168-42-229:8443
  name: minishift
- context:
    cluster: 192-168-42-229:8443
    namespace: myproject
    user: developer/192-168-42-229:8443
  name: myproject/192-168-42-229:8443/developer
- context:
    cluster: 192-168-42-229:8443
    namespace: myproject
    user: system:admin/192-168-42-229:8443
  name: myproject/192-168-42-229:8443/system:admin
current-context: default/api-crc-testing:6443/kube:admin
kind: Config
preferences: {}
users:
- name: developer/192-168-42-229:8443
  user:
    token: EKQqy2H3FLZ0t05RVWUo1wDt_PbSvINAVDfnWR9hGYg
- name: kube:admin
  user:
    token: kAiAW0DlssvmscV_30vVQtHOtoY68oq6NnmgVWAd0uM
- name: minikube
  user:
    client-certificate: /home/user/.minikube/profiles/minikube/client.crt
    client-key: /home/user/.minikube/profiles/minikube/client.key
- name: system:admin/192-168-42-229:8443
  user:
    client-certificate-data: REDACTED
    client-key-data: REDACTED
Para ver los operadores del cluster:
oc get clusteroperators
NAME                                       VERSION   AVAILABLE   PROGRESSING   DEGRADED   SINCE
authentication                             4.4.8     True        False         False      19d
cloud-credential                           4.4.8     True        False         False      19d
cluster-autoscaler                         4.4.8     True        False         False      19d
console                                    4.4.8     True        False         False      19d
csi-snapshot-controller                    4.4.8     True        False         False      19d
dns                                        4.4.8     True        False         False      19d
etcd                                       4.4.8     True        False         False      19d
image-registry                             4.4.8     True        False         False      19d
ingress                                    4.4.8     True        False         False      19d
insights                                   4.4.8     True        False         False      19d
kube-apiserver                             4.4.8     True        False         False      19d
kube-controller-manager                    4.4.8     True        False         False      19d
kube-scheduler                             4.4.8     True        False         False      19d
kube-storage-version-migrator              4.4.8     True        False         False      19d
machine-api                                4.4.8     True        False         False      19d
machine-config                             4.4.8     True        False         False      19d
marketplace                                4.4.8     True        False         False      44m
monitoring                                 4.4.8     True        False         False      19d
network                                    4.4.8     True        False         False      19d
node-tuning                                4.4.8     True        False         False      19d
openshift-apiserver                        4.4.8     True        False         False      38m
openshift-controller-manager               4.4.8     True        False         False      18d
openshift-samples                          4.4.8     True        False         False      19d
operator-lifecycle-manager                 4.4.8     True        False         False      19d
operator-lifecycle-manager-catalog         4.4.8     True        False         False      19d
operator-lifecycle-manager-packageserver   4.4.8     True        False         False      40m
service-ca                                 4.4.8     True        False         False      19d
service-catalog-apiserver                  4.4.8     True        False         False      19d
service-catalog-controller-manager         4.4.8     True        False         False      19d
storage                                    4.4.8     True        False         False      19d
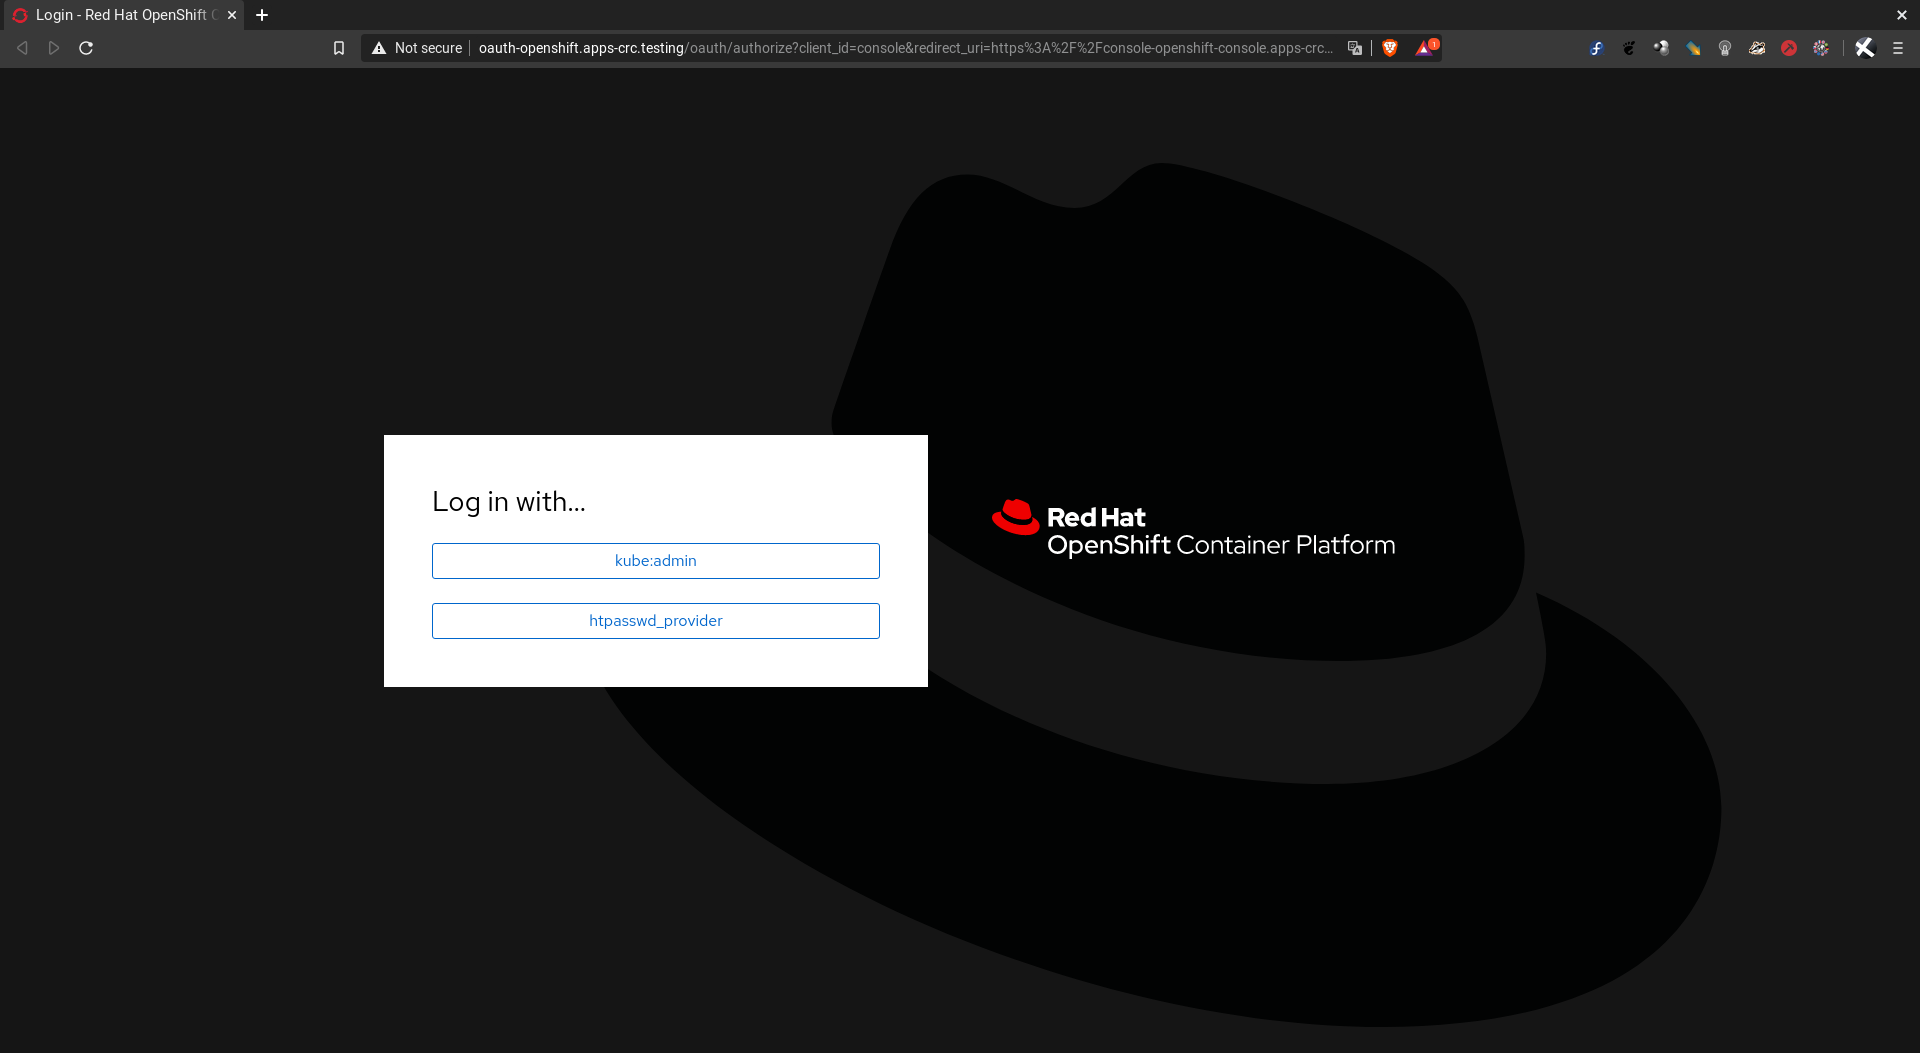
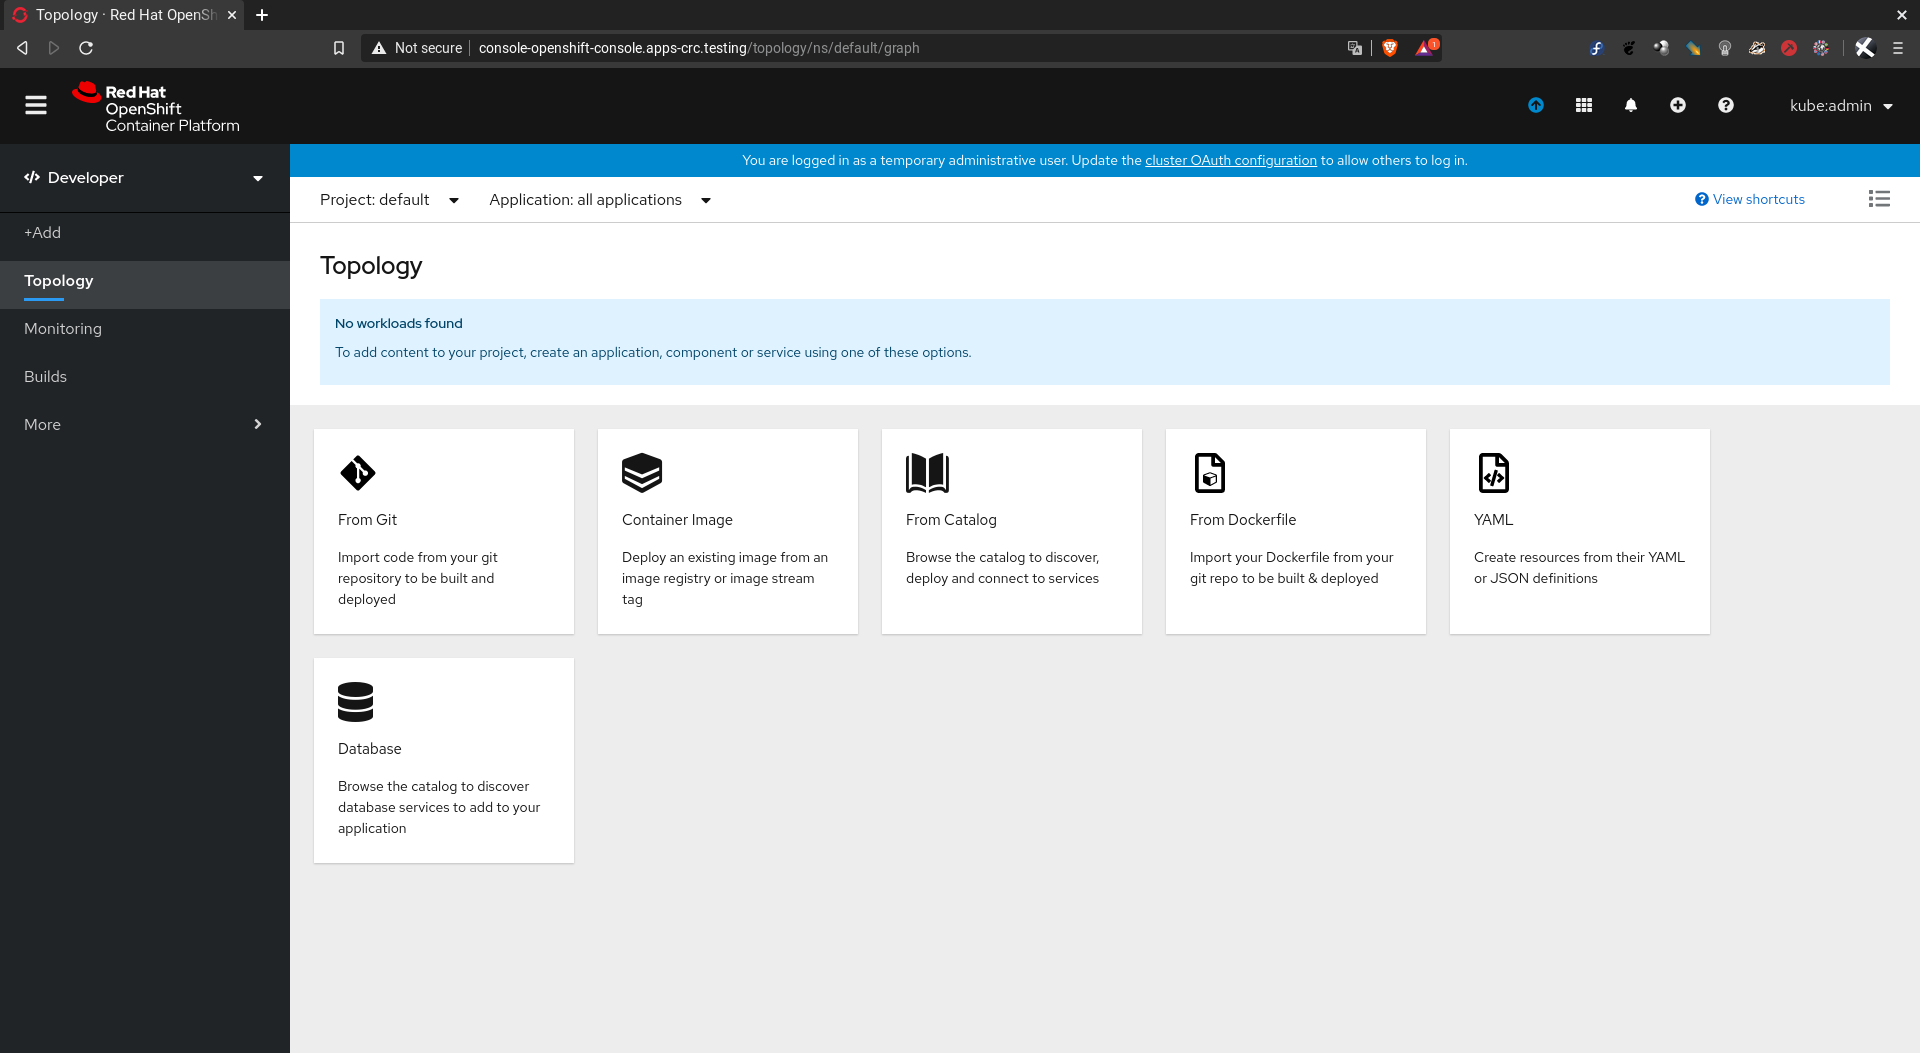
Paso 5: Accedemos al cluster#
Se puede accesar al cluster desplegado localmente a través de la consola o bien por la consola web:
oc login -u developer -p developer https://api.crc.testing:6443
The server uses a certificate signed by an unknown authority.
You can bypass the certificate check, but any data you send to the server could be intercepted by others.
Use insecure connections? (y/n): y

Login successful.

You don't have any projects. You can try to create a new project, by running

    oc new-project <projectname>
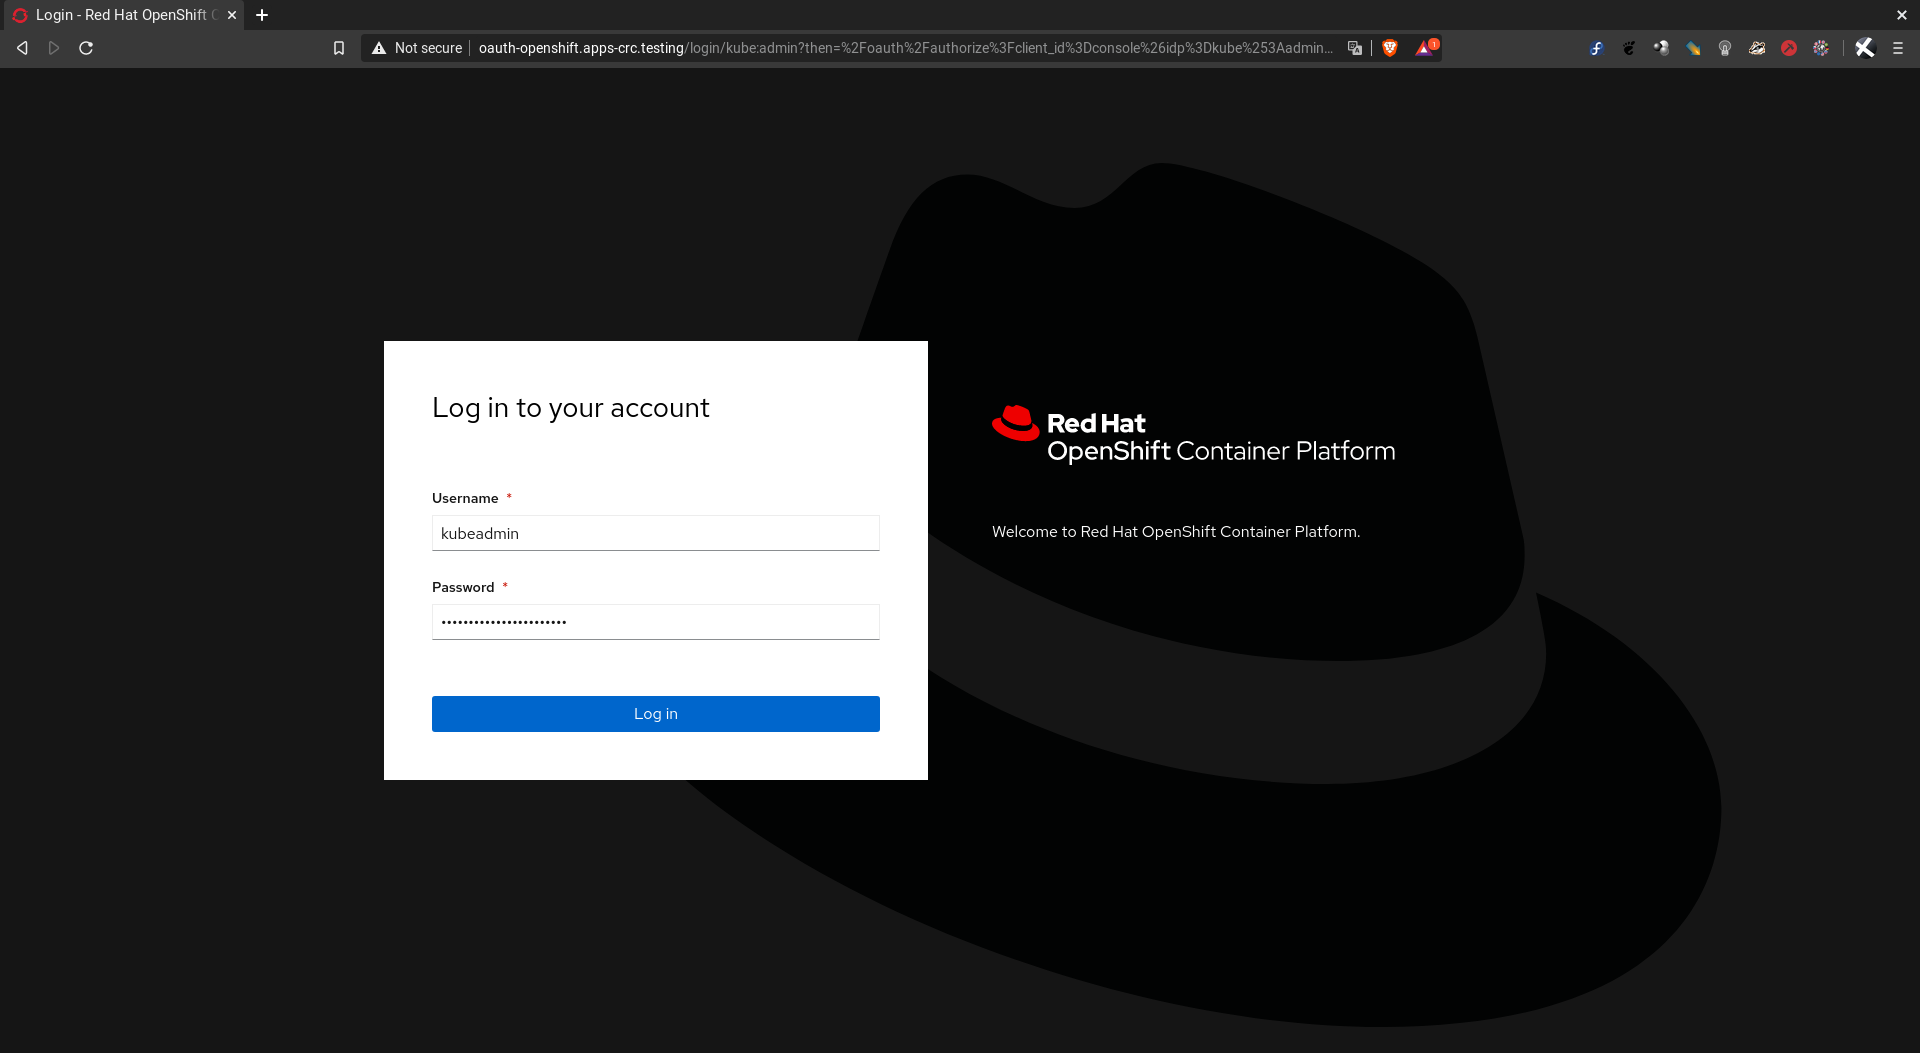
Acceso como administrador:
oc login -u kubeadmin -p fq66o-KsVBU-cnKBU-xLpqd https://api.crc.testing:6443
The server uses a certificate signed by an unknown authority.
You can bypass the certificate check, but any data you send to the server could be intercepted by others.
Use insecure connections? (y/n): y

Login successful.

You have access to 57 projects, the list has been suppressed. You can list all projects with 'oc projects'

Using project "default".
Para abrir la consola web desde su navegador predeterminado:
crc console
Si queremos saber la dirección IP del cluster:
crc ip
Paso 6: Deteniendo el cluster de OpenShift#
Para detener el cluster, ejecutamos el siguiente comando:
crc stop
Stopping the OpenShift cluster, this may take a few minutes...
Stopped the OpenShift cluster
Se puede iniciar nuevamente el cluster simplemente ejecutando:
crc start
Paso 7: Eliminando el cluster de OpenShift#
Si queremos borrar el cluster desplegado y ahorrarnos ese espacio en disco duro:
crc delete
Espero les haya gustado este tutorial, ¡hasta la próxima!